Posts

Handmade Hand Fan

Image
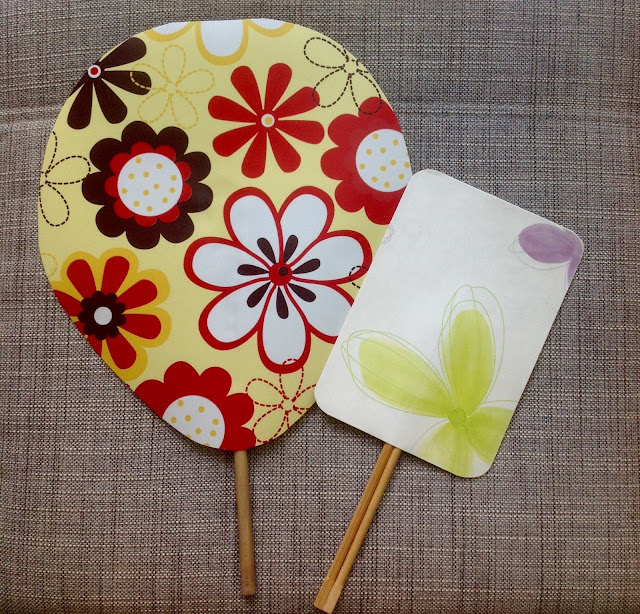
4 good reasons that made me think of making my own hand fan: Extremely hot weather Some used disposable chopsticks and manky wooden spoons lying around Some odd old table mats I can't be bothered to spend money on an ugly ones available in the shops And the whole process can't get any simpler: Cut out 2 identical rectangles from the table mat Spread strong glue evenly on the underside of each cut out mat, leave to dry. Stick the 2 chopsticks together with strong glue.  When the chopsticks are dry and firmly in place, apply thick glue over about 2-3 inches of the smaller end (depends on the length). Now place the glued part onto the middle of one of the cut out mat's underside, then press on the other cut out mat, making sure that all sides are in line. Leave to dry. Hold the sides in place with some paperclips or even clothes pegs would do. Trim to round corners with sharp scissors. Done. As for the other one, I made it slightly different: ...

DIY Tinsel Christmas Tree

Image
Angel lights are placed inside of the tree for a softer feel The bad news is, our tripod was broken (the top bit - heaven knows when and how that happened). The good news is, I can now use it for something else with no guilt (especially to all the photography enthusiasts out there) - as a base for our 2015 DIY Christmas tree! DIY Christmas tree from a broken tripod and some Christmas tinsel This has got to be the easiest-to-assemble Christmas tree to date. All I did was set the tripod up to the height I want, then tie the strips of Christmas tinsel around it. Everything can be packed away easily and reused for next Christmas. The wired ribbon has been used a few times on the 2012 Christmas tree on the wall , the 2010 CD Christmas tree , and our very first DIY Christmas tree in 2008 .

Sprouted Onions, Save 'em!

Image
It's frustrating when you're too busy to cook and find that the onions started sprouting. Don't bin them just yet. Peel off the rotten bits if any, place each one in a glass and fill enough water to cover the roots; they will grow into some fresh, green spring onion and double up as a nice little decoration by the kitchen window. Just make sure to replace water with fresh one every other day, and they would be good for a week or so. Once the bulb starts rotting you should harvest all the spring onion and get rid of the rest. At least by then it would have served its best to you.

Angel Lights and Paper Lanterns

Image
I shall sit under these lanterns to enjoy my mooncake with some green tea... It's been a while since we got our hands on some silly little crafty projects, about time to get those old paper lanterns out from the storage - as Mid Autumn Festival is just around the corner. Last year we turned some paper lanterns into tea light shades , and although the idea can still be reused, I thought we could do something different with the unused ones. The biggest issue we have with these paper lanterns was that they get burnt easily, so a non-fire related solution is essential. I saw some lanterns that use bulbs and thought that we can have our DIY ones: If the power sockets were designed in a more intelligent way, i.e. higher up on the wall and not all the way down close to the floor, we could have hung the lanterns horizontally, across the window. But since the angel lights cable isn't long enough and this is the furthest it can reach so it will have to ...

DIY Hanging Kitchen Hand Towels

Image
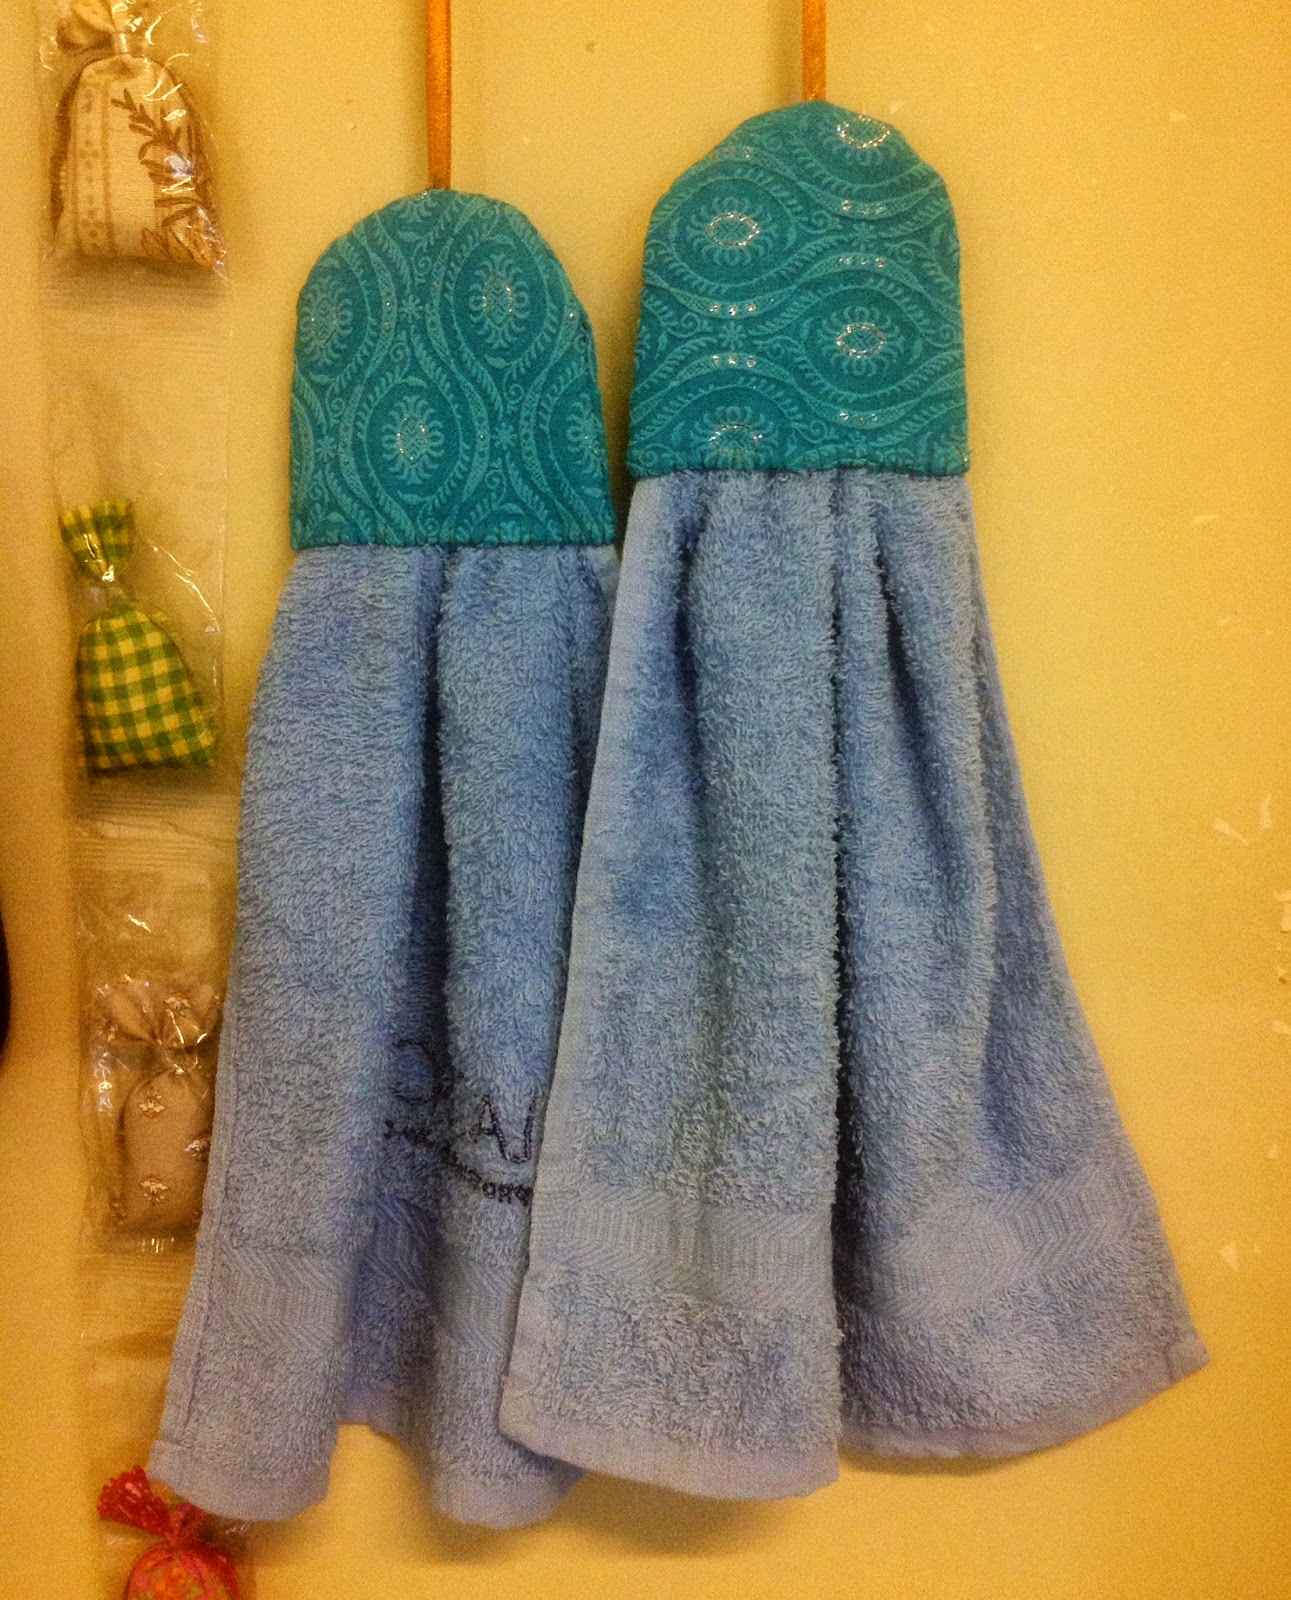
We've been using normal hand towels in the kitchen, but the nail keeps ripping holes in them. And as they are often hung stacked in double layers, drying is always a problem in this hot and humid weather which means it can get smelly too. But ready made hanging kitchen hand towels available in this country are often really horribly designed yet expensive. So here's a very simple solution - DIY! One existing hand towel cut into halves + some fabric scraps + two 6" long ribbons (hanger loops I cut and saved from clothing) = two new kitchen hanging hand towels absolutely free I can really get used to doing this :)

What to do with Old T-shirts

Image
We all use old t-shirts and clothing for cleaning purposes before we bin them. But here's something else we did even before they became our cleaning cloths: The last time we moved, a lot of our furniture got scratched because we didn't have enough shrink wrap for everything. So to still not spend too much on disposable material for this move, I used some of our old baggy t-shirts to wrap around smaller furniture: drawer units, cabinets, bedside tables, etc. After the move, they can then be cleaned again and proceed to their next stage: cleaning cloth :)

Reusing Wine Bottle Corks

Image
I have a bizarre sentiment for cork, especially wine bottle corks. Not the nasty plastic ones, but the real soft corks. Hence the collection of corks in our spare room. I have been thinking about how to make good use of them for the longest time, but nothing came up until recently - when I'm packing for a move. I was trying to flat pack our Ikea side tables, but when I unscrewed the legs, these long and dangerously pointy screws were left sticking out. Then I thought of our collection of wine bottle corks: Simply twist and screw it onto the sticking out screw. The sharp pointy screws are now well wrapped up and no one would get hurt. Hoarding on the old corks did pay out eventually. The rest of our wine cork collection was made into  trivets  :)