Posts

Showing posts with the label saving money

Tote Bag Upcycled from Depeche Mode Vest

Image
Been really lazy since Chinese New Year. And thanks to the extreme heat, it's painful to sit down for hours trying to make something. But there has been some occasional rain recently so I've managed to steal a few cooler hours here and there to get something done. I was given a Depeche Mode vest (bootleg one by the way, but still loved it!) a few years ago, but it never fit me properly- or should I say - it's my weird-shaped body that couldn't carry it off 😅 I would usually give away my old clothes to charity collection but definitely not this one - no way! Couldn't bear to see it gathering dust so I decided to turn it into a bag. And yes I haven't had too many bags yet 🙊 All I did was sewing the bottom together to make a base with gussets, trimmed off the shoulders and hemmed them; then finished with straps made from an old knackered neck tie. Took me one rainy evening 🌧 plus two punctured fingertips. I'm now ready to go shopping with my new p...

Recycled Congkak into Christmas Candle Stand

Image
Merry Christmas! Haven't been active lately due to living situation, which is why there's no Christmas tree this year ☹️ However a friend's Facebook post caught my eye and cheered me up. She found an old "Congkak" (a Malay traditional wooden game) someone threw away, and turned it into a beautiful candle stand centrepiece for Christmas. So I've asked her permission to share the recycling joy here: Photos courtesy of Miss Liew Siew Eng.

I Saved Myself £44 And The Future Of A Hush Puppies Luggage Bag

Image
When I arrived at the airport last June, I realised that the rubber grip on both my luggage handles had broken into pieces - disintegrated - literally! I ended up tying my scarf (I happened to be wearing one for the travel) around one just so that I could carry it without hurting my hand. I (and the luggage bag) survived the 3 weeks. This is mainly due to it being left in the spare room for the previous 2 years (that was how long I went without a holiday), and exposed to the very hot morning sun for hours on a daily basis. The cheapskate that I am, throwing the bag away is definitely not an option, let alone a Hush Puppies! It was the first time ever in my life that I bought such a high end luggage - for my kind of standard - and obviously, when it was on a really great deal. Being a 5-year-old luggage, it still is working really well except for the broken rubber grips. So the next option is to get them repaired, or at least just the handles replaced. I found a bag repair cent...

Pruning Mint For Newer, Healthier Plant

Image
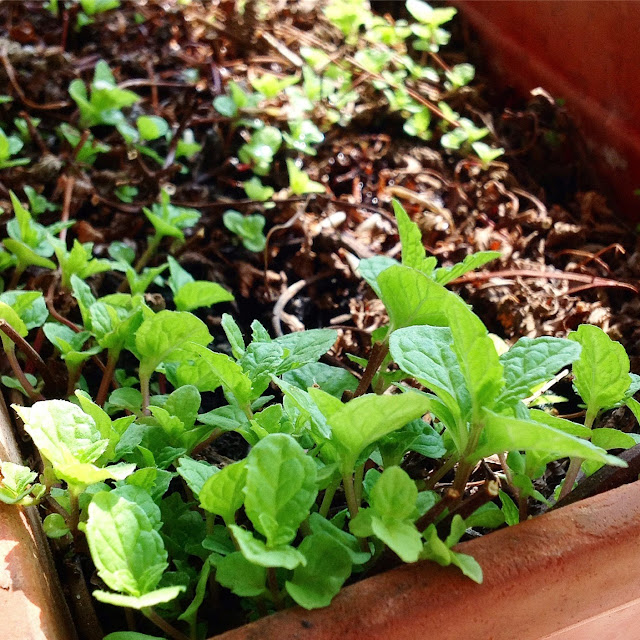
During the few weeks of dry spell and extreme heat in January, most of our home grown  mint plants  from cuttings became rather unhealthy looking, branches were dry and hard while the leaves were browning too soon. It was my cue for a cruel to be kind action: an absolute pruning. It really seems like a very cruel thing to do, as I'd have to cut the dry and dead bits all the way down till I can see some green in the middle of the cut stems, so that the plants get to grow new shoots again. Within 10 days, we've got some fresh new leaves sprouting all over the pot, new life just in time for the Lunar New Year of the Dog! I believe we'll have lots of mint leaves to harvest and dry for another lot of homemade mint sauce 😋

Drying Mint Leaves at home

Image
The mint plants are growing so well I have to keep cutting and drying them, and I now have opted for a bigger container: my dish drainer which I don't use often enough. And I have to start labelling them so that I don't get mint mixed up with basil, as they will lose their distinctive shapes when dried.  Here's my little labelling stick: 2 small labelling stickers on a toothpick 😄 Last update: 15 Sep, 2017 Since  replanting the mint , I've trimmed and pruned (and try to root more for planting again) a few times to try making the plant more bushy. Whilst I'm not planning to cook anything with mint at the moment and the amount of mint leaves I cut are not exactly enough to make mint sauce immediately, I'll have to preserve them by drying. The process may take up to a week or so, depending on the weather, but it's not a complicated one. I'm doing it 100% manually, as we do not have any high-tech equipment specially built for th...

Paper Lantern Lamp Shade - Get Ready for Mid Autumn Festival

Image
How do you like my Mid Autumn Lantern lamp shade? Since I've converted some paper lanterns into tea light shades , I thought I'd do just 1 more festive decor. Using the same method from the  tea light shades , by cutting out a large opening on the bottom of the largest paper lantern I could find; I simply place it over a table lamp. Obviously, I removed the existing lamp shade and put aside for the moment. Took me less than 10 minutes to get this done, and if I'm careful enough not to rip or tear it upon removal, I could probably reuse it next year.

Paper Lanterns as Tea Lights Shades - Much Safer Mid Autumn Festival

Image
Lighting and putting up the colourful lanterns at Mid Autumn Festival is always a fun thing to do. The adults will guard the kids with the candle lighting and the hanging of the lanterns at first; 30 minutes later it is the adults who can't seem to stop playing with fire. The traditional paper lanterns are our favourite but the problem is: it is extremely dangerous because the candles will either fall off halfway burning and burn the lantern up, or even if the candle manage to burn till the end it might still burn a big hole on the bottom of the lantern. So I decided to revive these lanterns by cutting out the burnt bit on the bottom and make a large round opening, cup them over some tealights: and serve as a beautiful centre piece on the coffee table: Now they are a lot safer to handle, and could probably last much longer (and I can reuse them next year!).

Growing Mint at Home from Cuttings

Image
Since the last mint plant died when I was away for 3 whole weeks, I had to buy a bunch of cut mint (cost about 50p) for some curry. It was quite a big bunch so I've done these: Pluck off all the bottom leaves, leaving the top 2 or 4 leaves, depending on the size (if small leaves, 4; if larger leaves, 2) These stalks are then trimmed from the bottom to about 4" length, and placed into a few glasses of water to root like what I did with the  basil Half the plucked leaves are used for cooking, the rest are dried in a covered colander (for about a week), chopped up and stored for future use The stalks rooted after about 8-10 days, at different paces, which I then planted in the soil. Here's a week later (25 Aug 2017): Obviously, there are some that didn't make it; but there are a certain few strong survivors 😊 The thing with mint is, they are such a hardy plant. Even if there's only 1 stalk growing, it will eventually crawl all over the soil and be...